Submit an application
Choose a program, confirm the institution and intake, review details, and submit only when your profile and documents are ready.
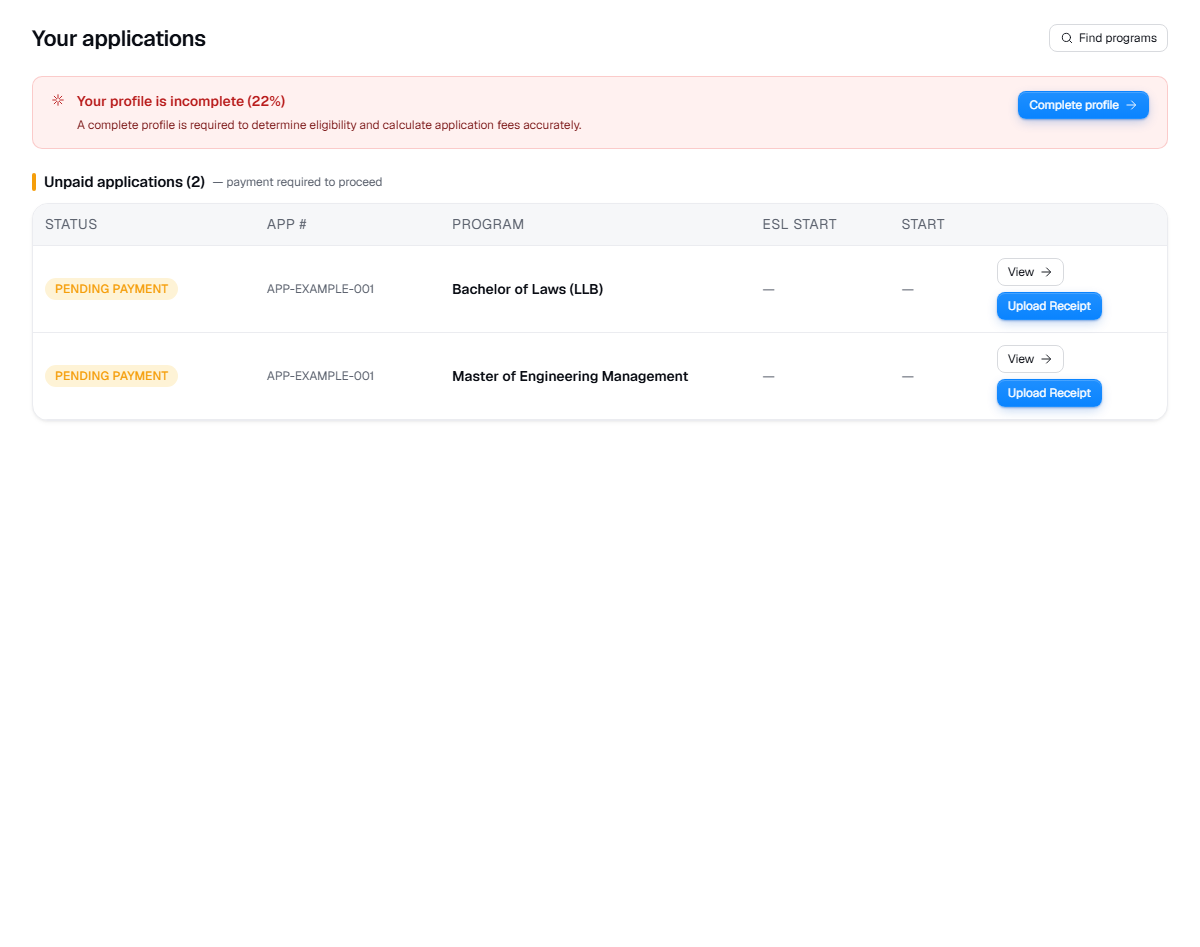
Live product screen
This visual uses the current UniGeni.ai route instead of a mockup.
Capture source
Use the source URL when this screenshot needs to be refreshed after a UI release.
Follow the workflow
Choose one program to apply to
Start from a program detail page or a shortlisted program. Confirm the institution name and program title before continuing.
Select the intake
Choose an available intake that leaves enough time for documents, review, offers, and visa planning.
Review before submission
Check program, institution, and intake on the review step. If anything looks wrong, go back before creating the application.
Track the new application
After submission, open the application detail page to upload requirements and follow status changes.
Open applications
Questions
Can I change intake after applying?
If you chose the wrong intake, contact your counselor or support flow as soon as possible. Do not assume the university will move it automatically.
Was this guide useful?
Related guides
Track application status
Understand dashboard applications, status badges, tasks, notifications, journey events, and what to do when a status changes.
Upload documents
Prepare and upload transcripts, passport scans, English certificates, payment receipts, and application-specific requirement files.
Understand deadlines and intakes
Plan around January, May, September, and institution-specific intakes so documents, review, offers, and visa timing do not collide.